Apparently I need to be reminded not to mess in the affairs of chickens.
I hope they are smarter than I think they are.
Apparently I need to be reminded not to mess in the affairs of chickens.
I hope they are smarter than I think they are.
It seems we’ve got some crazy eagle convention going on here or something.
They’ve been hanging out in the neighborhood for a month or so now, but until now they seemed to be focusing all their attention on the Samish River. Seems super late, but there must still be salmon running?
But this afternoon, just after the Seahawks miraculously won their wildcard game against the Vikings (!), I went out to celebrate with the critters and saw this
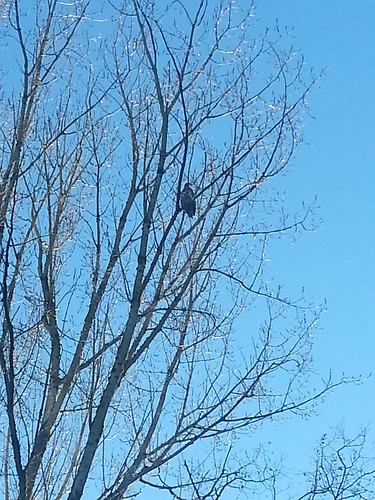
That is a tree right on the edge of our pasture.
I stood there for a while, chatting up the sheep, hoping that maybe he would move along if all the chigs were occupied in the shed with a bunch of scratch grain I tossed out to them. But no. Seems like he’s established a post.
I didn’t feel comfortable leaving the silly chiggins to innocently wander about with this thug eyeing them from above, so I took action to confine them in the shed for now by blocking the gaps under the interior gate and the shed entryway that are their primary access points.


They could still pop out from up on top of the hay if they wanted,,, but I think that’s a little high for them. Hopefully they won’t get that desperate to escape. They’ve got everything they need in there, and plenty of space for everyone to hang out. Hopefully in a couple of days the some of these aerial predators will move along.
In wool news, I’ve got one more skein of Chone yarn plied, washed and hanging to dry. Think that brings us to about 960 yards or so. And I’m done with knitting the argyle socks, but there is still a bit of seaming and a lot of end weaving-in to finish. So close, but yet, so far!
Also just wanted to put in a plug for the WSU Country Living Expo, coming up in a couple of weeks (Jan 30).
It’s going to be a great day of classes, an lunch is included in the registration fee.
If you have an old wheel sitting around that they’d like to get spinning again, or want to get some info and a little hands-on experience with a wheel before you buy one, I’m going to be teaching Spinning Wheels 101 (2 hour class) during sessions 1&2.
Have a great week!
Happy New Year to you all!
We ushered in 2016 quietly here- no parties out in the sheep shed that I’m aware of, though you never know what those crazy chickens are up to in the coop after hours….
As 2015 was drawing to a close, it occurred to me recently that I’m a bit behind in fleece processing.
Come March or April, the boys are going to be looking for haircuts, and I still have a couple unwashed fleeces from last spring tucked in a closet!
So I got down to it on new year’s eve and washed some Griff. He’s got the greasiest of my fleeces, so I did a stovetop washing to get a little heat boost.
So now I have some lovely freshly washed caramel colored fleece hanging out air-drying in our bathtub.

which is almost as good as having a sheep in the house 🙂
In other news, I’m now up to 7 skeins of chain plied Chone yarn (just over 20 oz). Really like the yarn but am still uncertain of what I’m going to make out of it. I’m waffling on Burr.

And I really thought I’d have my argyle socks done by new year’s, but it’s taking longer than expected.
It’s all going just fine,, but all those ends! Ohmygosh there are SO MANY ENDS!
I have one sock done to show you-
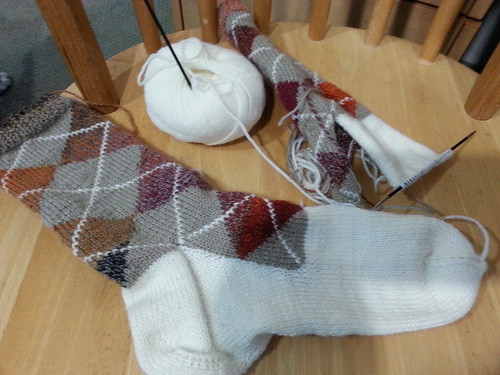
And it fits!
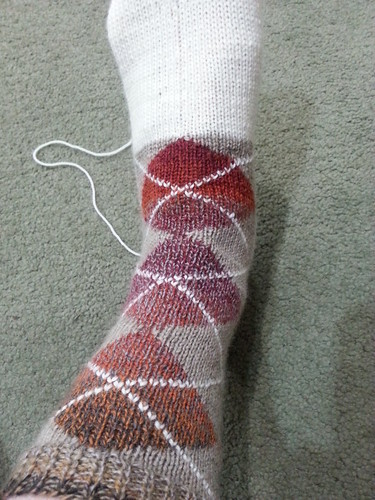
Here is a shot of the gusset.

In theory, the second half of the second sock should go faster, but I guess we’ll see.
Stay tuned.
Go Hawks!